Better Info, Better Pizza
To order The Original Encyclopizza from amazon.com, click here.
NOTE: This book is available from Amazon in both a paperback version and a Kindle e-book version. The Kindle e-book version is viewable on a smartphone (including i-phone), a tablet (including i-pad), and a computer (PC or Mac). For each of these applications Amazon provides a free downloadable app.
 Many
pizzeria owners —
and at-home pizza-makers, too — desire to create the finest
pizza possible. If you’re one of these persons, this book is for you.
It’s
440 pages jam-packed with thousands of pizza technology facts, tips, procedures,
ideas, and solutions. Using just one of these bits of information could
further enhance the quality of your pizza … or solve a nagging problem
… or make your pizza life easier and more enjoyable. This alone would
repay your investment in this book ten times over. To view the 15-page Table
of Contents, click here.
(To view chapter samples, see the “Look Inside” section below.)
Many
pizzeria owners —
and at-home pizza-makers, too — desire to create the finest
pizza possible. If you’re one of these persons, this book is for you.
It’s
440 pages jam-packed with thousands of pizza technology facts, tips, procedures,
ideas, and solutions. Using just one of these bits of information could
further enhance the quality of your pizza … or solve a nagging problem
… or make your pizza life easier and more enjoyable. This alone would
repay your investment in this book ten times over. To view the 15-page Table
of Contents, click here.
(To view chapter samples, see the “Look Inside” section below.)
This is the definitive guide on purchasing and preparing the ingredients that make up a quality pizza. It’s a massive resource that combines scientific findings and industry research with hands-on experience. In doing so it provides proven practical answers for pizzeria owners, managers, chefs, buyers, R&D staff, suppliers, and franchisees, as well as at-home pizza-makers.
It is a redesigned and republished edition of the seminal pizza guide created by John Correll in 1992. The original book, first titled “The Pizza Manager’s Guide to Ingredient Purchasing and Preparation” and later changed to “Encyclopizza,” was sold from 1992 to 1999. It was then retired, and remained out-of-print from 1999 to 2011. Growing demand from pizzeria operators and at-home pizza-makers has prompted the creation of this newly redesigned edition.
Its 440 pages are packed with vital information — including equipment specifications, proven recipes, step-by-step procedures, and a special trouble-shooting section for solving dough and crust problems. Among many things, a reader can learn how to manage pizza dough for proper rise and consistency, design special dough and sauce formulas, create distinctive cheese blends, select the best brands, gain supplier help and cooperation, choose the right mixer and use it properly, apply labor-saving methods, and — most importantly — create an even better pizza.
It includes a detailed 15-page Table of Contents — making it easy to find any bit of desired information in a few seconds. This softcover book comes in a handy 8.5 by 11 inch page size. It tips the scale at over two pounds, making it a weighty publication not only in content but also in heft.
In Correll’s words: “Even though this is a modern version of a 20-year old book, the vast majority of information contained in this reference resource (like, say, about ‘99.9 percent’) remains relevant and highly useful. Its new design and formatting creates an easy, pleasant reading experience — enhanced over the original 1992 print edition and greatly enhanced over the prior online version.”
The book’s subtitle is Pizza Ingredient Purchasing and Preparation. As this indicates, the book is about ingredient purchasing and preparation. Accordingly, it does not cover pizza-making — i.e., pizza assembly and baking. Perhaps some day an additional Encyclopizzia-type book on pizzia assembly and baking will be produced.
A
Look Inside …
Table of Contents
– click here.
To view the first
five pages of any chapter, click on the chapter below. Also, on the amazon.com
order page there's a Look Inside link for viewing contents of the
book.
Introduction
Chapter 1 – On-site
Preparation vs. Ready-to-use
Chapter 2 – Mixers
and Food Processing Equipment
Chapter 3 – Dough
Ingredients
Chapter 4 – Dough-making
Chapter 5 – Dough
Management
Chapter 6 – Dough
and Crust Troubleshooting
Chapter 7 – Sauce
Chapter 8 – Cheese
Chapter 9 – Toppings
Chapter 10 –
Commissary vs. On-site Preparation
Chapter 11 –
Ordering, Receiving, and Storage
Chapter 12 –
Measurements and Conversions
Technical
Info …
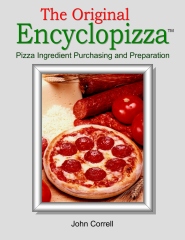
FULL TITLE: The Original Encyclopizza: Pizza Ingredient Purchasing
and Preparation
BOOK
TYPE: Paperback, 440 pages, 8.5 x 11 inch page size
AUTHOR: John Correll
ISBN: 978-0-9820920-7-1
LIBRARY OF CONGRESS CATALOG NUMBER: 2011943098
PUBLISHER: Correll Consulting, LLC — dba Fulfillment Press
PRINTER: amazon.com
DISCLAIMER: Click
here
To view a larger image of the front cover, click here.
TO ORDER THE BOOK from amazon.com, click here.
About
the Author …
 Photo
circa 2005
Photo
circa 2005
John Correll is a full-time writer. His specialty is easier books — easier to read, understand, and benefit from. His background includes pizzeria and restaurant manager, training director, corporate VP, entrepreneur, college instructor, business consultant, and, more recently, packaging designer and inventor (holding 43 patents). Nearly all facets of his professional background pertain, directly or indirectly, to the pizzeria and restaurant industry. He enjoys fishing, hiking, and long-distance bicycling. The principles of pizza-making and pizzeria business management have been an abiding interest of his for the past 45 years.
Full bio – click
here.
Front
Cover Pizza Image …
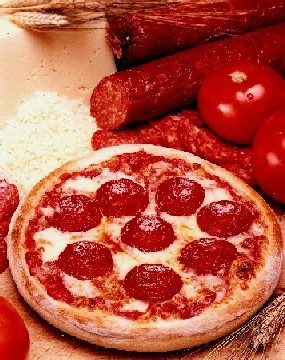 We
receive many comments on the pizza photo that’s on the front cover
of The Original Encyclopizza. So we’re posting it here for
your viewing. To see the photo in its full size, click
here.
We
receive many comments on the pizza photo that’s on the front cover
of The Original Encyclopizza. So we’re posting it here for
your viewing. To see the photo in its full size, click
here.
This photo was created at Pizzuti’s Pizza, Westland, Michigan, 1978. It’s of a personal-size pizza — 8-inches in diameter. It happens to be The Original Personal-size Pizza.
It was baked in the first conveyor oven ever used in the pizzeria and restaurant industry. Initially its name was Wonderoven. It had seven decks (count ’em). At the suggestion of John Correll — the owner of Pizzuti’s Pizza — the oven manufacturer changed the name to CTX-70 Cooking System (subsequent models used an inline conveyor belt system as opposed to the pusher-arm system shown in the oven in the photo).